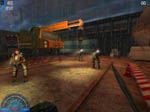
Everything you see in game, is textured. It is the 2d art that is mapped onto three dimensional geometry.
Everything that you see in a 3D game has a texture mapped onto it. Be it a weapon, a wall, character, or a building, there is a texture covering it. 2D and 3D art for these textures and skinz is a painstaking and professional process. It is also the quickest way to change the look of any given scene.
Click here for a couple quick and easy tutorials for converting character skins using the Lithtech tools known as Dedit!
In general you will need three programs to get to work with textures. You will need either LITHREZ or WINREZ, to extract the existing textures from the rez files that are an archive with the shipped game resources. To learn to how unrez a file like AvP2.rez read this. Installing the Tools
Once you extract the packed files from the rez, you can access them using the Program Dedit, which is basically a 3D level editing program that is proprietary to LITHTECH that is made available under a User Agreement. Dedit has a specific function that converts .DTX (Lith extension) to standard TARGA (.tga) and PCX file formats. Once you export these files in either .tga or .pcx, you can manipulate them in any paint program.
This is where the true artistic talents come in. In either of three or four different paint programs you can alter the textures to create completely different characters or merely add clan emblems and markings. You can create new characters, cut and paste, photorealistic faces and do almost anything that a creative mind can envision. When complete, save the work of art as a TARGA .tga or a .PCX file. Check into paint programs that give you the option to open files and save files of these two formats. Then you use Dedit to import them back into .DTX format. It may sound a bit laborious but its actually pretty simple and you can figure it out in a couple hours. Once converted to .DTX, all that is left is putting the new file into a rez file (which is just a another folder that the game recognizes).
Again, use LITHREZ or WINREZ to make this rez file. The most importnt thing is to duplicate the exact directory structure of the game, for it to load correctly when the game is launched.
AT GAME LAUNCH, you simply type in the command line:
-rez custom\mytexture.rez
The command line tells the game to look into the CUSTOM folder for additional files that override the existing game files or add to the existing game files. If you think about it, it's a great and sensible set up for a game engine.
Alright, needed to get that out of the way cause, you know someone would skip everything else and jump straight into Textures and skin edditing.
Import the .tga or .pcx art into dedit under the texture tab?
You can double click on any texture under the DEdit "Textures" tab, and a pop up box appears.
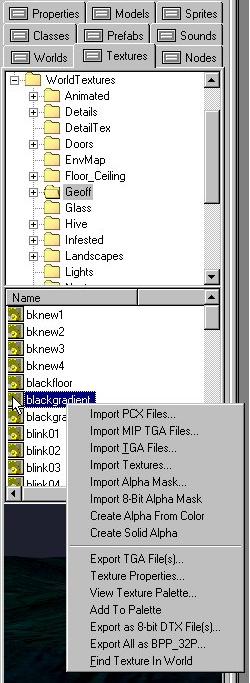
iIt gives you the option to import or export textures using Dedit. The important thing to remember is the file format should be 32 bit true color TARGA .tga or .PCX. Since texture files are organized in specific folders for easier retrieval, it's a good idea to import wall textures for example in the WALLS folder. This process works exactly the same for Character skins, and or weapons skins.
Each texture in the game has a corresponding texture surface flag associated with it. Look at the top of the next screen, to the top box that says "Flags." That number has a reference in an attribute file, so Dedit knows, which sound files to play when the player walks on that surface texture, you hear metal, wood, or dirt. You can look at other textures to see the different ones. You should also notice that most game textures are compressed 8x, or 4x.
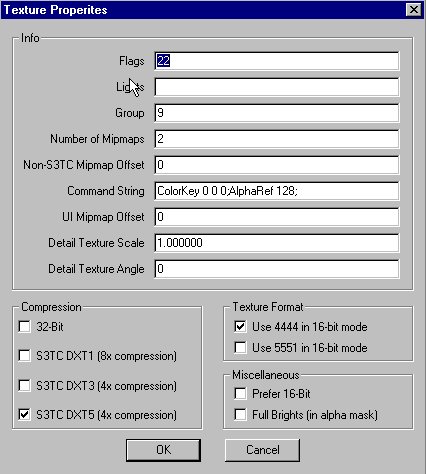
You can change the surface flags of a particular texture that is on, that will not effect the other surfaces with the same texture. Some of the numbers are 70 for dirt, 22 for metal grating.
Look in the attribute file for the complete listing of texture flags.
It should be noted that the choice of textures is very inportant. I go into more detail on the alpha channel of a texture in the Grates and Railings tutorial.
Textures practically SELF-ALIGN when you build on the grid.
I think I've mentioned this a few times now, but as you scroll through the available textures under the TEXTURES tab, you'll notice that the sizes of the textures are the standard grid sizes I have described earlier. So it makes sense to build the brush geometry that corresponds to these numbers.
But on occasion you have to manipulate a texture, on either a brush or a individual face, you can do this in Brush Mode for entire brushes or Geometry Mode for individual brushes.
Select the brush, and then RIGHT CLICK. The pop up menu gives numerous options. Check em out.
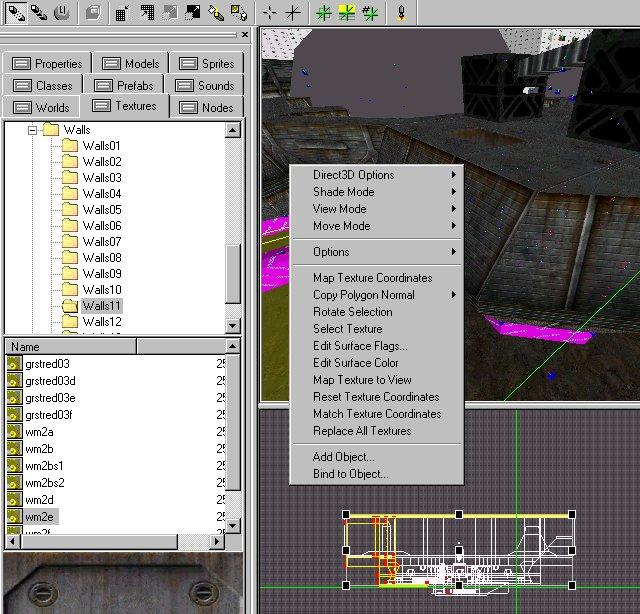
You can do everything from map texture to view, to map texture coordinates, to reseting texture coordinates. This is a hands on type of discovery. If you right click and choose "Select Texture" on a brush in Geometry mode, you can call up the texture under the texture tab. That's a lot quicker than scrolling through the folder trying to find the same texture.
Create a small map and give it a try in both Geometry mode and Brush mode, and see which ones function in a particular mode.
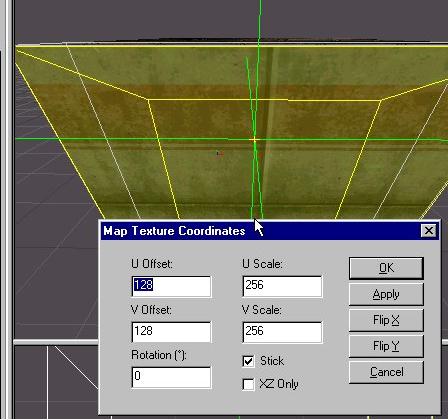
A very important one, is MAP TEXTURE COORDINATES. On the occasion that you have to change a scale of the texture because of a misalignment, or perhaps it is the offset from the edge of the brush, or it is the angle, or you want the texture to follow a set of stairs, or you decide to shift the texture 90 degrees cause it looks better. The most powerful function is merely a RightClick away.
Texturing made easy. A couple short keys.
Short Cut Key CTRL-T changes the textures on a whole brush in Brush mode. You can also change any single face of a brush in Geometry mode. In Geometry mode, with nothing selected, the face will highlight in red when the mouse moves over it. You can apply the texture by pressing CTRL-T.
1.The "K" key, in geometry mode, point at a face and hit the "K" key and it will realign the texture on the face to one of the edges. Hitting "K" again will align to a different edge, ect.
2.)Again in geometry mode, aim at a face and hit the arrow keys. The texture will move the direction corresponding with the direction of the key pressed. The distance that the texture moves is based on the grid size, to move smaller distances make the grid size smaller. If the texture is aligned to an edge with the "K" key then the texture will be relative to this edge.
3.)You can expand or contract the scale of the texture by hitting CTRL+Arrow keys. This will scale the texture, and again if the texture is aligned to an edge it will scale from that edge. The amount of scaling is based on the grid size.
4.) You can texture in the 3D rendering package of your choice. SoftImage, Maya, 3DSMax and then import the geometry into DEdit fully textured.
5.)While in Geometry mode, Holding "R" and moving the mouse moves the texture. The left mouse button will resize the texture. The right mouse button rotates it.
Now for something really cool!
Animated textures which would include something like a flashing light panel or TV.
You can make animated textures, things like TV screens, and flashing lights using sprites. Sprites are *.spr files take a series of textures and flip them in sequence like a movie. You can add one easily to a single face by going to the sprite under the sprite tab and highlighting it. Then on the face of a brush (highlighted in red, geometry mode) you use CTRL-T, and the sprite texture will go on the brushes face. One thing with these, you should have Light Animations also checked in the processor window, once you start doing more complicated stuff, like adding animated sprites and starlight views. You can adjust the texture using the "Map Texture Coordinates," and when you run the game, the face should be an animated sprite.
There are other things you can do with the texture face of a brush. Perhaps you want the illusion of moving LAVA. In the brushes properties, you put "PAN" in the effects, and numbers like 55 15 in the effects parameters (without quotes). The texture on the brush will move 55 units by 15 units in the x and y every second.
You can also make a MIRROR effect. Though this will be discussed in another section regarding glass and Transluscents.

One thing you should note, if you create custom textures and you want them to show up in other people's games, you need to rez these custom textures with your map in a rez file in the same structure as it shows up in DEdit. We'll talk more about this in HOW TO REZ.