Props make a level come alive and help add detailing.
We've already looked at a lot of things that require a bit of work to set up. But its becoming obvious that none of this is really rocket science. Well this is the single easiest way to make your maps look awesome with hardly anywork at all.
You first set the cursor where you want the PROPTYPE to go. The placement of the cursor is very important. You might have to adjust the placement of the object so it fits right and looks right in the level. Proptypes tend to be set MOVE TO FLOOR=TRUE. But these setting are semi coded in an specific attributes file.
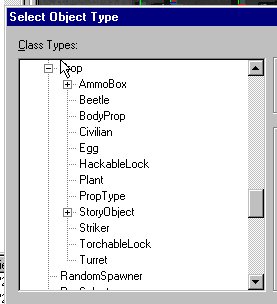
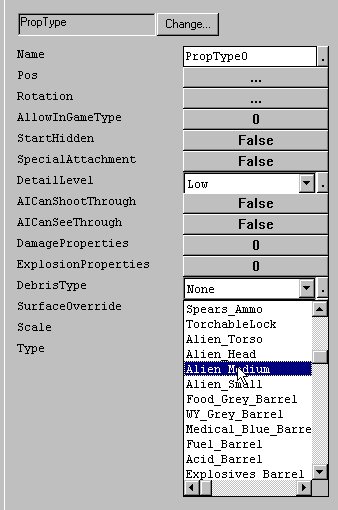
While in brush MODE, rightclick, and select ADD OBJECT, (you can also use the Worlds menu and click on Add an object) and then scroll down the objects list to PROPS, if it is not fully expanded, click on the PLUS + sign and then choose PROP TYPE. The first proptype on the list is the default that is placed in the level.
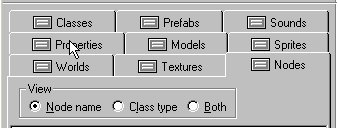
If it's not the one you want don't worry we're going to change it. Go to the properties TAB, and you will see a model name, click on the down Arrow and the entire list of available models will be listed, just go through them. And find those true gems.
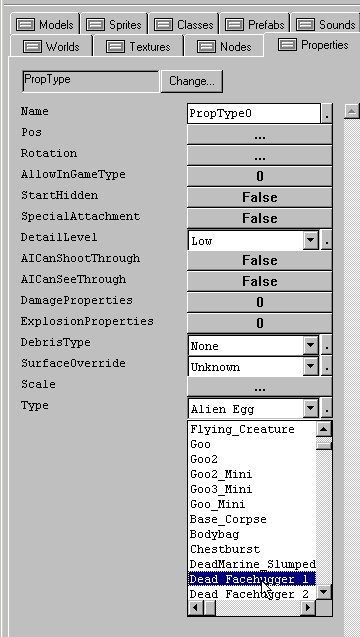
Here's where you will find the vegetation and the misc. prop items and the machines and the ALIENS encased in Liquid. As well as the vehicles and other models. Everything to bring your maps to life. You place each one of these in your map and process. and then adjust its placement relative to location in the map.
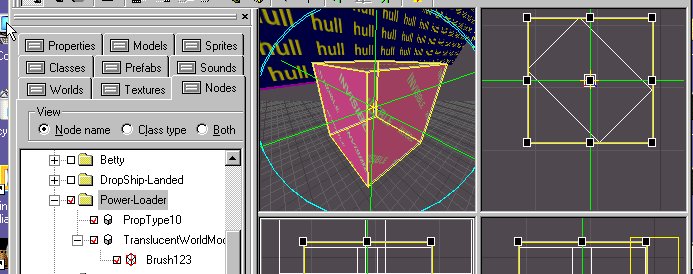
There are some issue with any particualr model being solid or not, and you might have to build an invisible bounding box for the model so people don't walk through it.
.
PROP and PROP TYPES in general should be set to SOLID=FALSE with a a TransluscentWorldModel Invisible BLOCKER placed in the same location so the player can't pass through it.
But use a the MAIN PROP OBJECT for more features?
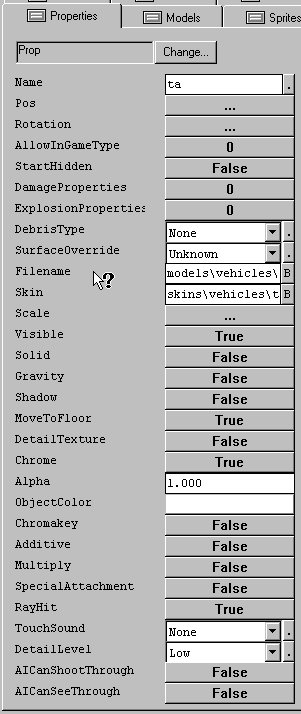
You should consider using the the PROP object for more control over your props. You can adjust scale, you can have them play animations, you can make them non solid, and you can choose their debris type, you can also adjust their scale and change there textures. There is considerable more control with them as well. In general use Proptypes for repetitve, non movig props, and use the PROPS object for animated type props. That's not a hard and fast rule, but that's how I do it. The advantage is you can set the model file and the texture file. Why is this important? Well for example it is the only way you can get the burnt out APC into the game. And then list the two textures required for the interior and exterior, and then set the textures to work properly with the chromakey=true flag , which was a problem I had solved for Windebieste's Gladiator skirmish map.
Let's take a look at using a prop object. And then secondly, how to make an animated prop:
1. create a prop object
2. name it something - for example, "dropship_1"
3. in the prop object's model property, tell it to use the model file you need - for example, dropshipanim.abc
4. in the prop object's texture property, tell it to use the texture file you need for the model's skin - for example,
dropship.dtx( this requires four .dtx files listed in the field for the dropship)
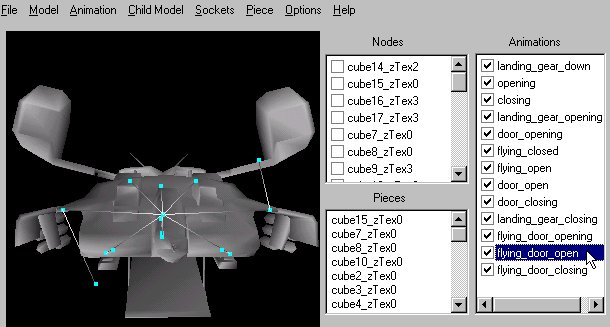
5. open modelEdit and load the model
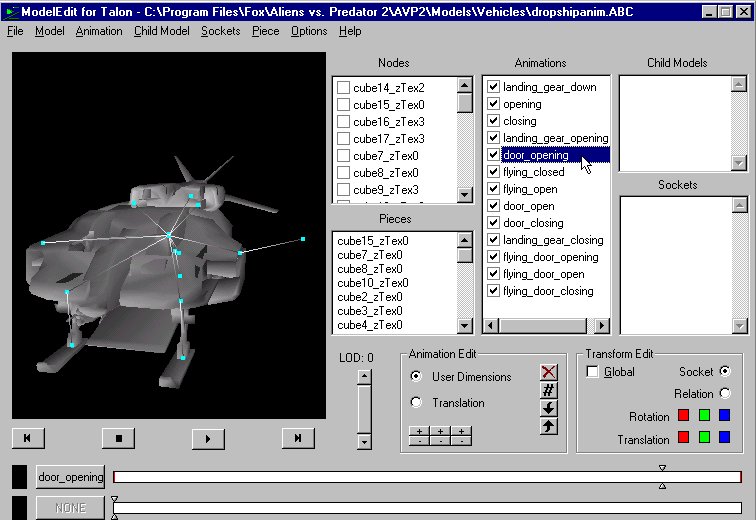
6. look at its animations, and remember the name of the animation you want it to play. It works like vcr, hit the play and select the animation. The exact spelling of the animation name is important. Upper/lower case is important.
7. create a trigger object - in that trigger object you can send a message to the prop object to get it to play its animations. in this example you might have a trigger with:
msg dropship_1 (anim door_opening);
You could also set up a series on animations. Lets assume the door opening animation take 8 seconds. After that we would want the soor of the dropship to remain open so we would set up the animations to foolow eachother.
msg dropship_1 (anim door_opening); msg dropship_1 (animloop door_open);
anim=animation animloop=animation loop
the animation will continue to loop until a new message is sent. If you just want an open Dropship like in verloc, there is a static dropship model with its ramp down, that does not require the animloop message. This is important cause every animation message will require processor time in game. They add up. Use the static model whenever possible.
Here is another animation that could work particulrly well as part of a keyframer. We explain how to attach prop models to Keyframer here.