Start by opening up the AvP2.dep project, and open a level or create a new one .
You will be building custom levels in the the AvP2 project. Open one of your existing levels or start a new one.
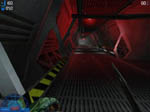
You'll find that the door is the most common object used in mapping. It is used extensively in LITHTECH mapmaking cause of its versatility. It is even used for the basic elevator between floors which you can find out about in LIFTS section of these tutorials.
Go to one of your walls, where you want to put a door. Use the "S" split function to cut out a door in the wall. Change your grid size to 32 units. This is how you do it. Never carve a door, use split, (which is "move cursor", space, space "s") it takes a little practice, but it'll be second nature after a few minutes. Remember the S key. Pick the wall brush you want to split. High light it. Now using the cursor, make a line with two points. TRY TO STAY ON THE GRID. Start the line where you want it, hit the space bar a red dot appears. Drag your cursor, a white line will extend from that point, hit the space bar again. You will have a second red dot. Now hit the "S" key, the brush will now be split in two. Repeat the process for the other door jamb and the top header. You usually need a minimum of three or four splits to make an opening. the resulting piece can then be resized (thickness) and used for the door.
A STANDARD DOOR in Nolf was 96 units wide and 128 units tall. In AVP2 the doors are bigger, I think more like 96 wide by 192 high, basically to accomodate the larger alien species.
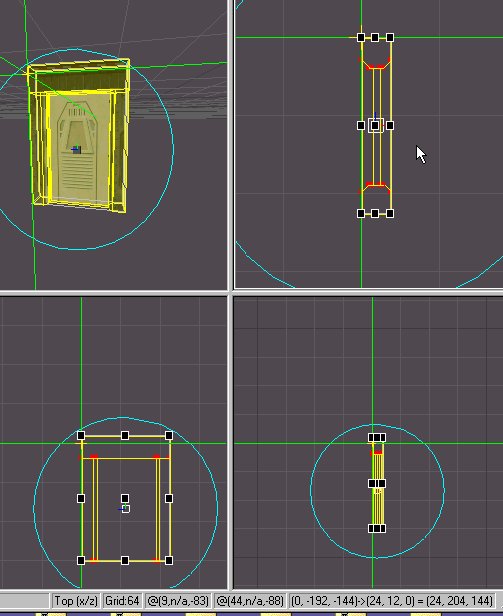
Use the resulting brush, after you've split the wall as your door. In the top FLOORPLAN view, reduce the thickness of the door to 8 or 16 units. Use the -/+ keys to change the grid as necessary.
There are specific textures for door brushes using the standard size. Choose one that is appropriate for your room, and hit CTRL-T. Always remember to apply additional TRIM textures to the thickness sides of the door as well. You can find out about changing textures in this section Textures/Surface Flags
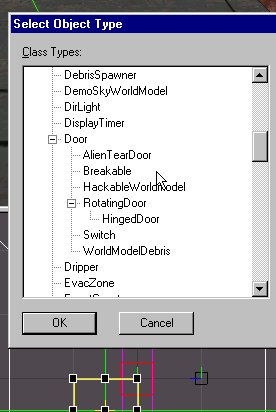
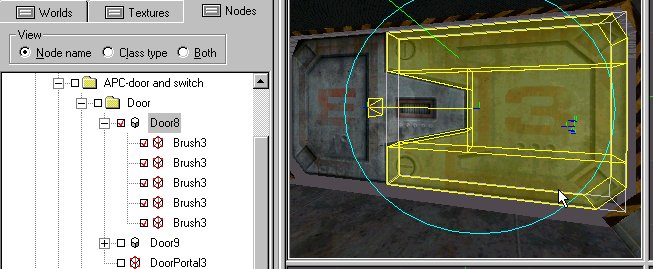
Now hit the MARKER TO SELECTION, so the cursor plants itself in the center of the new DOOR brush. Right Click, And select BIND TO OBJECT, the object we need is DOOR OBJECT, scroll to it. If it is not expanded, click on the + sign. As mentioned, the DOOR object has a ot of variety to it. For now, we just want your basic door, so select it. A door object will be created in the center of your door brush. Keep it selected.
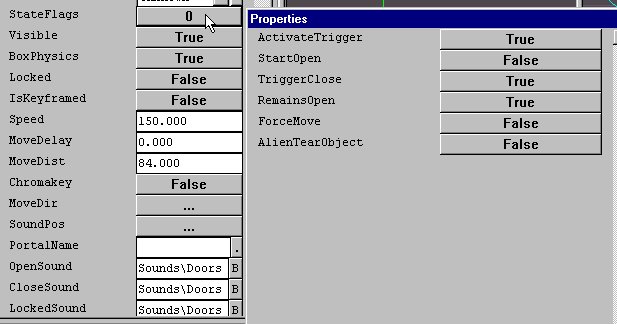
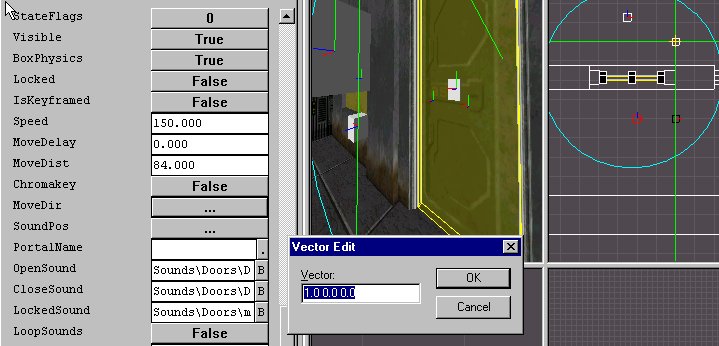
Now go to the properies tab. This is where the true complexity of the door object gets interesting. In this case we'll start with something simple. We want the door to slide out of the way when we press the default "USE" key "E". The door will basically slide into the wall. Since we're using a standard sized 96 units width, if we slide the door 84 units in one direction it will disappear into the wall, and just extend out a bit to make it look right. So what we need is the direction of movement, since we have already established the standard distance. The great thing is Monolith has already coded this standard in to the door object
So in the properties tab, set Movedistance 84 is set and is set Movedirection 1.0 0.0 0.0 (this here is important, each of these numbers represents the X,Y,Z, coordinate. So making the X coordinate 1.0 tells the engine to slide the door brush horizontally in the positive x direction. It will take a bit of practice to figure out the positive and negative coordinates but it is not too complicated.)
Unfortunately, we're still not done. Search for STATEFLAGS and click on the button. There are various flags here that influence how the door operates. You want to indicate that the ACTIVATE TRIGGER is set to TRUE (which will give you the green use symbol) and that TRIGGER CLOSE is TRUE, (which will require the door to be activated to close it). Now PROCESS. You should be able to walk up to the door, and the green use symbol should appear. Press E and the door will open horizontally.
Now to make a few adjustments. Set OPENWAITTIME to 4.0 seconds.
If you set TRIGGERCLOSE=FALSE, the door will automatically close after those four seconds of wait time. PROCESS. You should be able to walk up to the door, and the green use symbol should appear. Press E and the door will open horizontally. Because we set the time open to 4 seconds it will start to close shortly after. Download a sample level with basic sliding door.
Interesting NOTE about SOUND FX in a door field.
If you only have a sound set for the opening of a door, and not closing a door, the door will default to the opening sound and use it for the closing sound as well. If for some reason you don't want the closing of the door to have a sound, placing [null] in the closing SOUND FX door field. You can also assign a different sound for the LOCKED SOUND.
DOUBLE DOORS
Most doors in AVP2 were your typical double doors, one opening to the right one to the left. These applied to both the Security type doors and the Garage APC door. The basic principles of a standard door apply here as well.
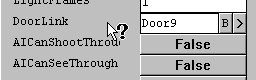
You create the unique door design using whatever brushes you need, and then you select them all and bind them to a single door brush. This takes care of one side. The important things to note are that the Speed, MOVEDISTANCE and the STATFLAGS settings are consistent between the two sides. Let's assume this first door will have the MOVEDIRECTION of (1.0 0 0) along the X axis. The second adjoining door would have the opposite MOVEDIRECTION (-1.0 0 0)
Alright simple enough. The next part links the two. The DOOR OBJECT has a DOORLINK FIELD.
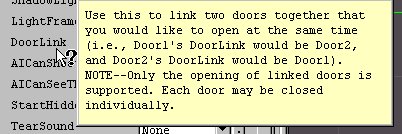
Specifically designed so if one of the doors is activated, the linked door is activated as well. You simply place the name of the door you want to link into the field. The object takes care of the rest.
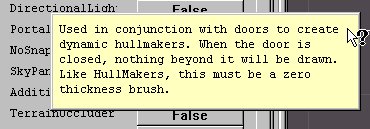
The last element to consider with the door object is the PORTAL. If used in conjunction with properly set VIS blockers it can help keep maps fast and efficient. You basically create a single side PORTAL BRUSH and put it at the door. When the door is closed, the PORTAL blocks vis.
Simply place the name of the portal in the field porvided.
HINGED DOORS
HINGED doors were extensively used in a game like NOLF, but in AvP2 sliders are the most common. An example of a hinged door is the RAMP on a dropship or a lid on an AMMO box. (Though both of these are models with separate animations.)
The key for a hinged door is setting the rotation point. A hinged door rotation point defaults to 0,0,0, what you need to do is place your door hinged object at the rotation point, then literally copy/paste the object's position (second down from the top) to the rotation point
Then you have the option of ALWAYS MOVE AWAY from the player, which generally set to true works, though on ocassion set to false is better. And finally you need to set the angle of rotation, which defaults to 90 degrees, you have to play with the move direction as well, if you want it moving in the x, z axis, or y if you want it more like a ramp.
There are advanced techniques using this very versatile object. Along with these common message commands and triggers, that cause multiple events. If you are going to learn how any one object in Dedit works, make it the door object. l.
BREAKABLE DOORS
Binding a Brush to a Breakable door object, makes the brush disintegrate under the player after approx. 2 seconds, (the default). You can adjust the amount of shake, and if the brush will be destroyed after or just fall and potentially crush what's underneath it.

Its important to think in three dimensions, specifically for move direction
If you have previous experience with 3D mapping, it shouldn't be too difficult to incorporate what you have already learned and adapt it to these tools. Everything happens in the (x,y,z) axis. The door examples above could either move along x or along z. A door that moves up into the ceiling has a positive y direction, and into the floor negative y. This is the same principle for a basic lift or elevator. Check it out here, Stairs, Lifts & Ramps. It takes a while getting used to it, but it'll be second nature soon enough. Just remember the top down floor plan is the 2D (2 dimensional)(x,z) axis.
Learn the basics first. Understanding the door object is probably one of the most important objects in mapping.