Start up Dedit. Double click on the icon. Open the AvP2.dep
You have to open the avp2.dep project. You do not create a new project, instead you will be creating new worlds and levels in the existing AvP2 project. This is how you have access to all the textures and sounds and objects that were made available that you had extracted using UNREZ.BAT. If you haven't run unrez.bat, read Installing the tools.
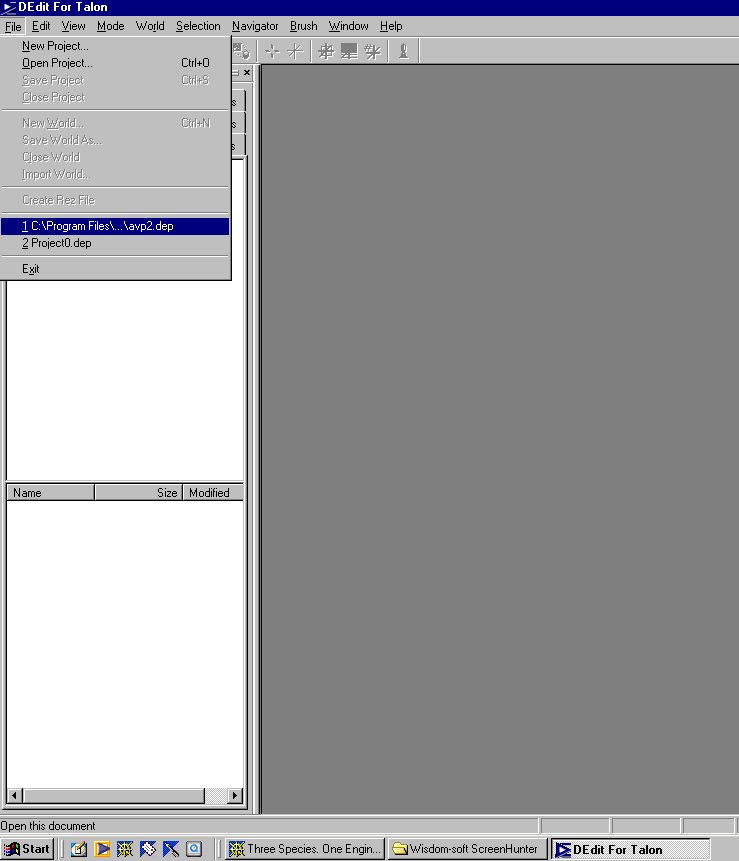
Now, if by chance you don't see AvP2.dep at the bottom of your file menu, browse to it using the open project under the FILE menu.
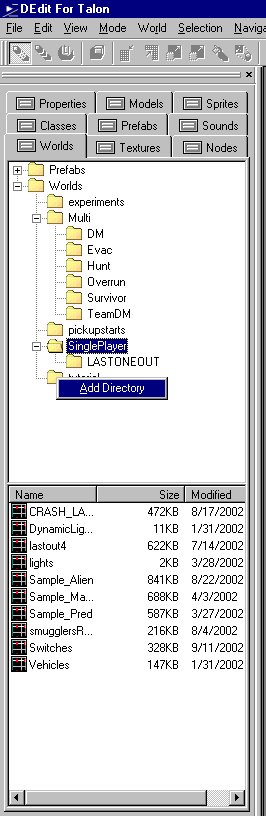
Once you have opened the AvP2.dep, you'll have access to all the game resources. That's over 900 megs worth of files, so you will need navigation skills. Start with the nine (9) tabs on the left column. Click through them. It's important to familiarize yourself with moving around the tools, even before you build anything. As you can see, my version of Dedit has additional directories, which I created using the add directory function. Ignore these extra ones for now.
Dedit is State of the Art game creation software, you will need to take time to learn all the nuances.
At this point, you really have two options.
You can open a Sample map from the ones provided as part of the download.
Click on Worlds, Click on DM, click on Sample_DM
Taking a look these can quickly and completely overwhelm a new mapper. If you are going to choose one, pick from the mulitplayer maps. SAMPLE_DM (which is A LESSER FATE) is worth a look. Try studying it.

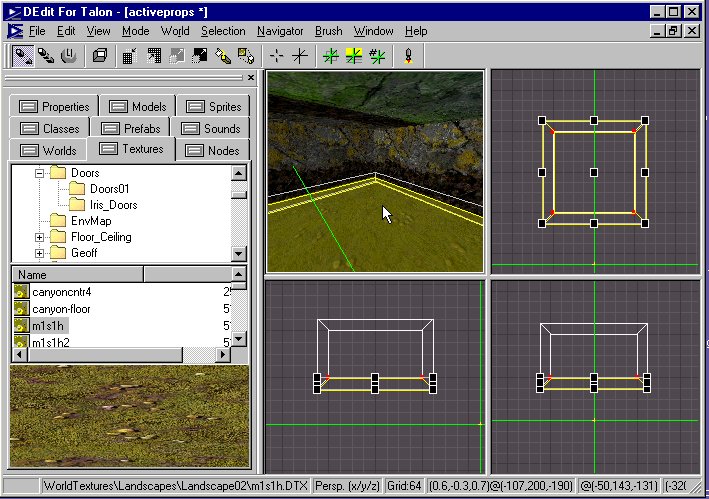
All of a sudden you notice that the screen fills up with four views of the LESSER FATE map. The main Dedit window has three areas, the toolbar, the TABS and project window and the four Viewports on the right side of the screen. These will come to life when you open a world with four views. Your WYSIWYG 3D texture view ( a fairly close representations of what you'll see in game) , a 2D Topview floorplan, then a 2D Front view (line drawing), and a 2D Side view.
Let's go through a few basic commands to get you moving around the Dedit level. You can navigate around the screen using basic keyboard and mouse commands.
You can navigate around these views by pressing either the "o" and "i" on the keyboard while moving your mouse. "o" zooms in and OUT, "i" moves the view around. Move your mouse forward and back, and from left to right. Not much point in describing it. Just try it. The documents tutorial that came with the tools goes into greater detail regarding these basics. Check them out if you need more information.
While you are moving the mouse, you'll notice the numbers across the bottom display changing. this defines your exact position in Dedit units.
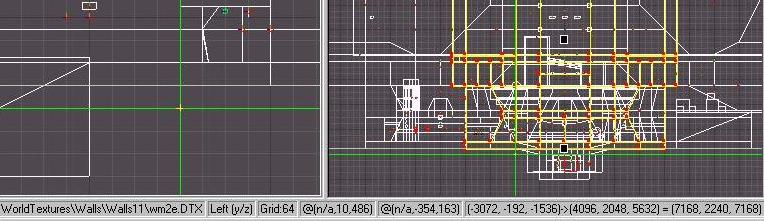
Each window represents a different axis, (x,y) , (x,z) , and (y,z). You'll also notice if you click on something like a brush, it will be highlighted in yellow, ( the default color). And if you notice, there is also an indication of the grid size in Dedit units. Each view can be set at a different grid size. I'm going to repeat that. Each view can be set at a different grid size. It is very important that you keep track on the grid size, because it can cause severe confusion with relative sizes as you are mapping. You can change the grid size by simply using the NUMBERPAD - / + signs. As a general rule remember to always build on the grid. 64 Dedit units is the default grid for a reason. You should only go to a smaller grid for detail work. I consider the grid to be 8,16,32,64,128,256,1024 (they are powers of 2)
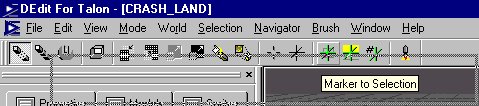
The most relevant part of the TOP toolbar is on the right end. If you slowly move your mouse over those green cross hairs you will see descriptions of their function. Pay particular note to MARKER TO SELECTION, and CENTER VIEW ON MARKER . These two are invaluable to mapping. By default, you should be in brush mode, so if you click on a brush (piece of geometry) it should highlight to yellow, it is now selected. If you click MARKER TO SELECTION, the triple cursor will center on that brush, or if you select a group of brushes holding the shift key, then it will center on the group of brushes.

I suggest you Close your Sample_DM map. Go to file, Close world. You will have an empty window again. We're going to create a new world just to get a few more fundamentals down.
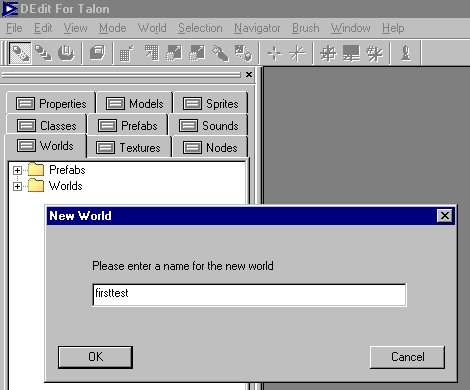
Click on FILE / NEW WORLD you get a pop up asking for a name, call it firsttest.
Okay, we have a grid, we have four windows, and it is completely empty.
Okay, make sure you are in BRUSH MODE, so let's create a brush to see what this program can do. If you look across the top toolbar you'll see BRUSH. Click on it. You will see ADD PRIMITIVE, Move your cursor over it, it will expand a menu.
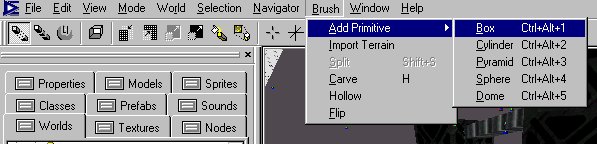
Choose BOX, it will ask a size, the default is 128, which is fine, though for our purposes 256 would work better, so type it in, and accept it. Now you have a six-sided cube sitting in your level editor and it should still be highlighted in YELLOW. Move your mouse cursor over it. The cursor will change to four directional arrows when near the center of the box. You can move it in any of the three 2D views. If you move the cursor over to the outside perimeter you will notice the cursor changes again to a 2 directional arrow, which indicates you can resize the box, expand or shrink. Just click and hold and drag. Practice with the one box until you're comfortable. Try out the other primitive shapes.
You can also change the texture on these primitive brushes, as well as any brushes in Dedit simply by hitting ctrl-T. You select which texture you want to use under the texture tab. Most the textures used in Dedit are sorted in the WorldTextrures folder, all listed in subfolders, like door, floor/ceiling, walls,....
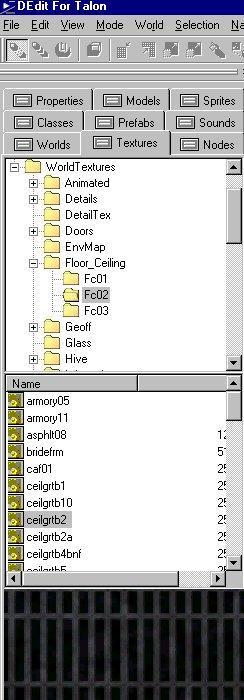
Whichever texture is displayed in the bottom panel will be the texture in use at that time. You can change it easily by selecting another one and highlighting the brush and using the keyboard shortcut ctrl-T. Take a few minutes and investigate the textures folder, sometimes textures can provide inspirations for a map.
Close this World when you're done with it. It's purely a practice level to help familiarize yourself with the Tools functions.
One of the great things about Dedit is it has descriptions of practically all buttons, by simply hovering your mouse over a button a situation specific help description becomes available and is invalauble. And to finish it off, the Help Menu has a list of keyboard shortcuts to get you working quickly with the tools. There's a whole chapter on them here KeyBoard Shortcuts. You can jump to this section. The information is interrelated.
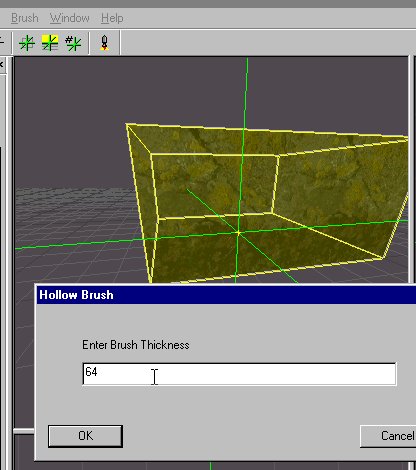
Let's Try a few things with the tools. Let's try out the HOLLOW function. It's a super quick way to build a room, though it has some limitations. There are always tradeoffs. You can create a hollow room in less than a minute, but it is not easily resizable. That is why I describe a better build style in the next section, though it is a slower process.
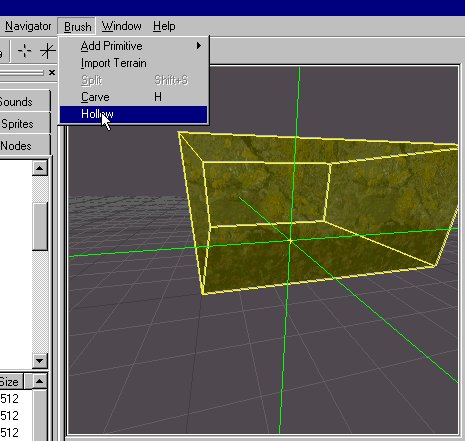
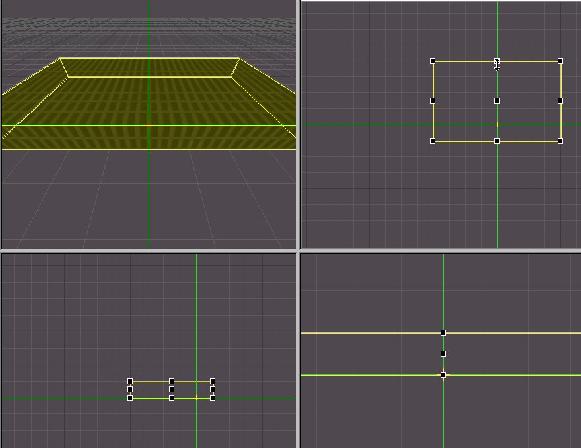
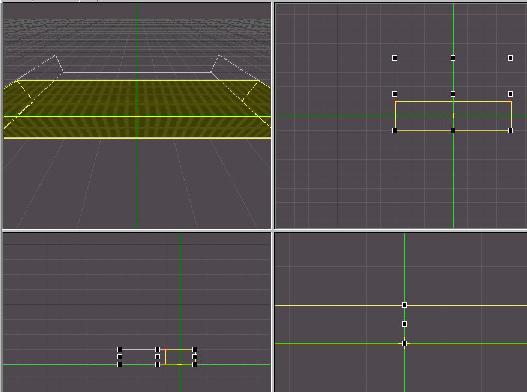
The mitred joints are perfect 45 degree angles and function properly if they are not moved. But if you move them, gaps in your level can happen, which will generate a leak and create problems. Make sure you select all six panels if you plan to drag and resize the room. As you move it the angles change and can theorectically cause problems. You have been warned.
You can easily resize 90 degree cubes and rectangles. They maintain their square angle characteristics, and if you build on the grid, the individual brushes will butt up tight to each other and not casue any leaks.
In case you haven't realized it yet, these are absurdly powerful and capable tools, that can help you create just about anything you want.
In a few days you can check out this Orientation video. It will give you the basic functionality of Dedit, to familiarize yourself with the interface and the options at your disposal. It'll be available as soon as we establish a download link.
YOU MUST SET EDIT\OPTIONS\RUN
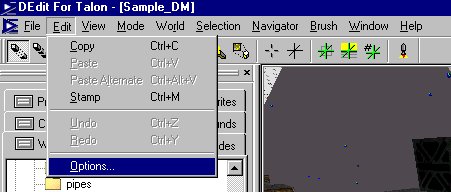
Then in the pop up window screen, you click on the RUN tab. and browse to where your lithtech.exe is installed. The example here is to the default tools installation directory. The tools run best when they are installed there. It offers the least amount of confusion, so if possible install it in the default location. Make note of the PROGRAM ARGUEMENT . TYPE exactly as you see it.
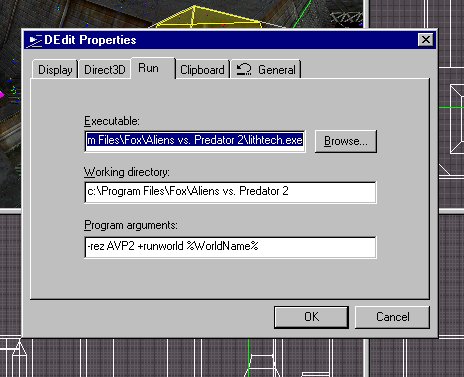
%WorldName% is case sensitive. You do not replace it with the name of your level. You leave it as it is. Your level will not run if this is not set. The processor/engine/launcher replaces it for you when you run your level.
You are ready to create your own first world. Which is what the next tutorial is all about. Your First Level