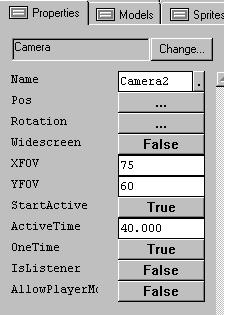
Setting up a camera is as simple as rotating, point and shoot.
You might want to set up a new sample level for this.
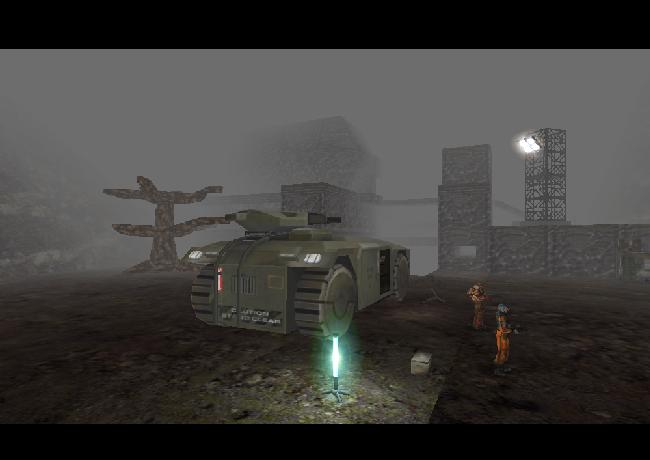
This is an example of the letterbox format or WIDESCREEN. It changes the aspect ratio. Gives it more a of a cinematic look. You can choose not to use it. This is taken from my level Breakdown.
The important thing with a camera is it overrides the player view. Guaranteed. So if you start a camera it take precedence. This is important that you dont set up a camera to play in a situation where your player can be in the process of being attacked. Cause he won't be able to defend himself. It should also be remember that in a Multiplayer game if the camera gets switched on, every player in the level gets to see the same cinematic.
The camera can be set to a ACTIVE TIME, in this case 40 seconds. If you set the time to -1 , it sets the camera to infinte, and then you can switch it on and off using messages.
msg camera 34 On;
msg camera01 Off;
Based on experience, I would suggest you always place an ACTIVE TIME on the camera object, so it shuts itself off at some point. Eventually.
Most the other flags are self explanatory. If you rightclick on the fields you'll get a run down. The ALLOWPLAYERMOVEMENTS isn't coded so you can't do much with it. Leave it false.
The camera object is the poor cousin to the next object we are going to have a look at, the cinematic trigger. But it can serve a purpose. it is a quick unencumbered different point of view that you can easily set up in game for a variety of purposes.
Plus all you guys with filmmaking aspirations. Machinima and Lithmation are a great way to delve into moviemaking and animation to create your next epic. Its easily the least expensive piece of quality movie making potential you can get your hands on. Take advantage of it.