One floor Up.
You have created two levels, and now you want to join them and make access. You really have four options besides using the standard elevator.
You can:
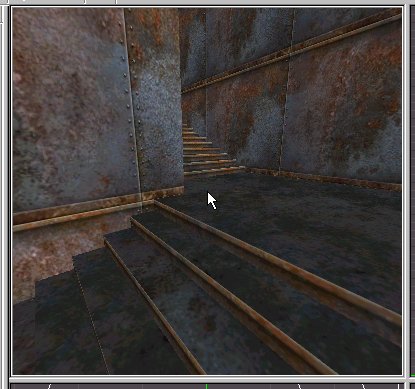
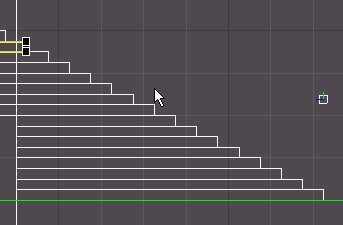
1.Create stairs using multiple brushes of the same height and width either set as open concept, or with walls on both sides creating a stairwell. You basically stack 16 units high brushes on top of each other, making each one 16 units shorter as they go up. You usually need 16 stairs to make it to the second floor. 16x16=256
2.OR you can create a 5 sided wedge that gets placed on the first level, giving access to the second level.
3.You place various crates, boxes and other furnishings strategically allowing the player to jump up towards the higher level
4.A LADDER, which has two components. A 6 sided brush that looks like a ladder because it is textured and a LADDER VOLUME that is coded to raise the player when looking up.
First thing you will notice is the number of brush faces each of these produces. A Single step has six sides, since most steps are designed to rise 16 world units, you would need 16 stairs to get up to a level 256 units higher. That's an additional 96 polies for the engine to process.
A wedge/RAMP has 5 sides. From a purely functional point of view, in MP, ramps are more favourable in open areas. That's why in a LESSER FATE, there are no stairs.
The other option is strategically placed boxes and crates. Given that each crate has six sides, it is still better to use 4 boxes over a set of stairs.
Stairs should be used in confined spaces that are blocked from the rest of the map by corners and walls that block the view. OUTPOST 4 is a good example for stair use. In addition, the stairs that are out in the open have a well on both sides, that effectively removes the side polies of the stairs during processing. Use RAMPS whenever possible, you'll find your maps are more efficient that way.
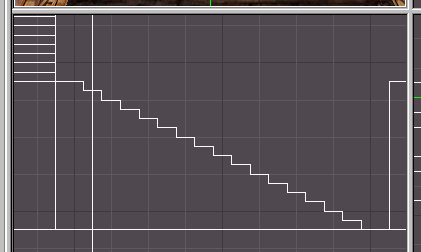
Your other option with stairs takes advantage of nosnap building. You remove all the faces except the ones you see, and set the brushes to nosnap=TRUE. You must run the processor with -nonapnocsg or bind the stair brushes to a TWM.
And when it comes to ladders it's really very simple. A ladder consists of two parts, the part that moves you, and the part you see. The part that moves you is called a ladder object. You make a 64 x 64 brush, and make it very tall, like 256. You highlight the brush, right click, and bind to object LADDER. That's called a ladder volume. The object is in the VOLUME BRUSHES\LADDER. That's the part that moves you when you go inside it. The other part it simply a brush that looks like a ladder. Just make a brush about 8 x 64, and make it almost as tall as the ladder volume brush. Put it right beside the ladder volume brush. Now make sure the brush is highlighted, right click, and bind to a transulsantWorldModel. Turn on transparency in the properties.
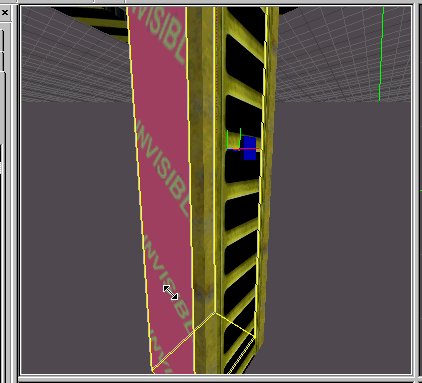
It's simply a fake ladder you see... Of course give it a ladder texture, and also give the ladder volume brush an invisible texture.
Use the door object for elevators and Lifts
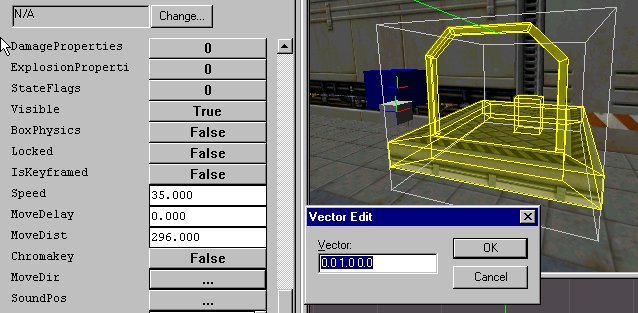
A lift or basic elevator functions exactly like a standard sliding door, except the MOVEDIRECTION is along the y axis (0 1 0), and usually around 256 units and up. Set up a horizontal brush at least 16 units thick, then place MARKER TO SELECTION, and bind it to a door object. Set the move direction and speed as you want and set the STATEFLAGS to self close so it is reusable. The problem is the trigger. The standard door activation that we used for the door with the green cross hair doesn't really work for a vertical lift like this. It would be much better if it functioned when we walked on top of it.
We'll need a TRIGGER for this, which is just another object, with specific functionality. Basically a trigger activates an event, when the player's bounding box intersects the area of the TRIGGER volume. So give the TRIGGER dimensions under the DIMS flag of 64 64 64, and place it in the center of the platform. Now use the TARGET files to give the message: msg platform TRIGGER. You might want to set a delay so it can't be triggered again till it goes through its motion. Also don't forget to go into STATEFLAGS and set ACTIVATION TRIGGER=FALSE, since you have the trigger doing the actual activation.
I'll set up a downloadable zip with a sample of these.