Reality happens in the details.
Start by opening up the AvP2.dep project. You will be building custom levels in the AvP2 project. Open one of your existing levels. Or create a new test one.
You'll find out how to bind transluscent objects to brushes to make them see through, this is prefect for bars, railing, grates, and metal truss structures.
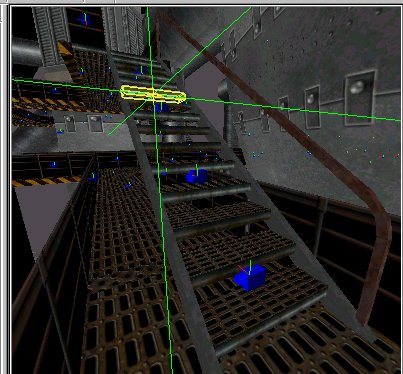
Create a brush, we'll be making a railing on the floor, so lets make it 64 units high, 8 units thick and 256 units long. Use the -/+ keys to change the grid as necessary.
The key to TRANSLUSCENTS is using the right textures.
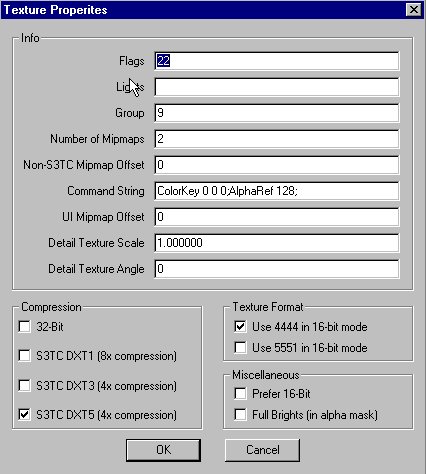
There are specific textures that are designed to represent rails and grates, hive gunk, etc. Find them in the WorldTextures/floor/ceiling folder, as well as the TRIM and Details folder. Pick one.You have to double click on the textures, in the textures tab to call up the textures Properties pop up and the Alpha channel.
Have a look at this one, it's a good example of appropriate Alpha channel, which is represented with the black and white solid color matte.
.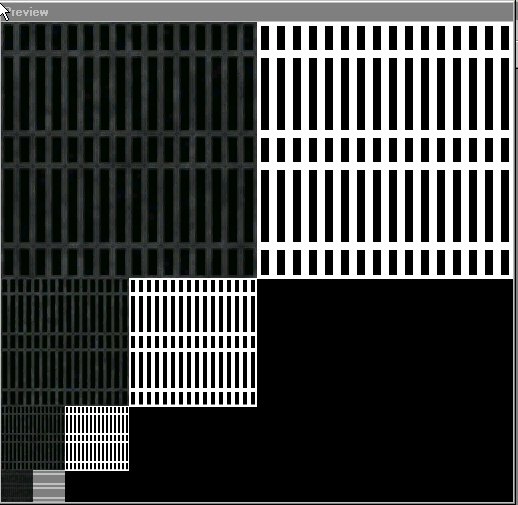
The black in the texture will be transparent when seen ingame if you follow the steps below.
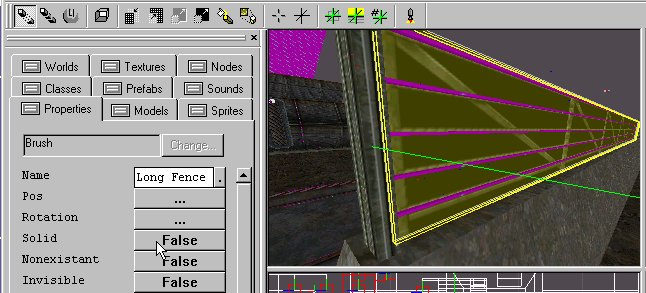
Texture the new brush with it by highlighting the brush and using CTRL-T. Now hit the marker to selection, so the cursor plants itself in the center of the brush. The advantage is you keep track of the TWM and the associated brush (its always at the center) . Right Click And select BIND TO OBJECT, the object we need is TRANSLUSCENT WORLD MODEL, scroll to it and select.
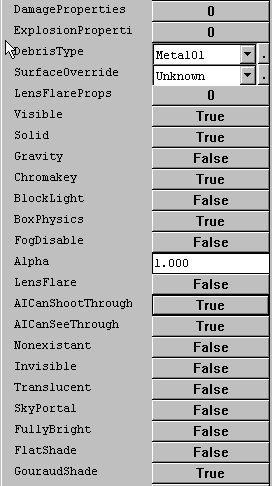
If you now go to the propeties tab, this will be different from the windows you set the flag to TRANSLUSCENT = FALSE for Railings and Grates. The only difference is, you don't want transluscent you want CHROMAKEY=TRUE.
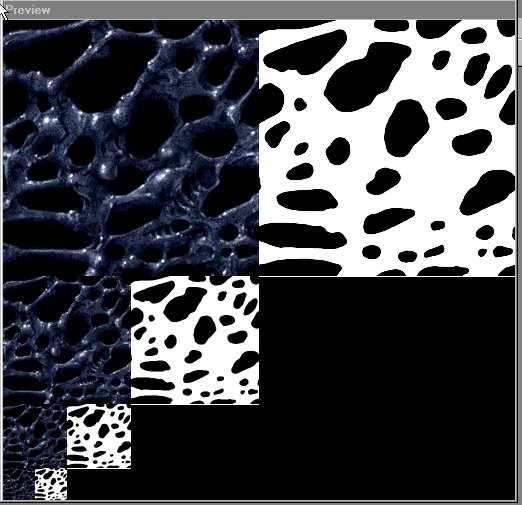
It'll take the Alpha channel into account, and remove the areas of black from the texture. The one thing that needs to be kept in mind when creating Grates using a TWM is that you use the right texture. Not all textures have an approriate ALPHA channel so you won't get the effect you want. If you go into floor/ceiling and choose one of the grates textures and double click on it in the textures tab you'll pop up a texture menu that will display the texture and the associate ALPHA channel, the WHITE/BLACK matte to the right. You'll notice a pattern of what you would see through. If the particular texture has a solid white alpha throughout, then it won't work well for GRATING, and you won't see through it or it will be completely see through.
Giving a sense of depth makes a level look larger than it is
Fencing to inaccessible areas or to areas that a player has not arrived to yet, makes levels seem large. This was done very well in HALF-LIFE and OPPOSING FORCE. Get into the habit of creating areas outside the play area.
One other thing worth considering when working with Chromakeyed Railing textures is how they'll react to bullets in game. A Quick intuitive solution is to make the actual TransluscentWorldMOdel and brush SOLID=FALSE and then place invisible black brushes where the texture indicates a solid rail of wire should be. That's howt your visible geometry will behave as players would expect in game. This is how we did it in DM_OVERWATCH
Advanced Chromakey:
As it applies to single sided polies. Once you get involved in -nosnapnocsg you may be interested in returning to have a look at the following, which only applies to advanced techniques.
(alz offered this on the forums) Translucent textures & textured faces: If you have a single sided polygon that used a texture with an alpha value and is set to transparent there is no need to flip the texture, it will texture both sides. However, the non-textured side will appear, but not be solid giving you a double sided polygon with one side non solid.
This works if you set the single-sided poly to translucent. You can however, set it to chroma-key instead. Chroma-key'd objects react to lighting more appropriately. Transluscent objects tend to only sample the general light level, not light cast.
So, if you use Chroma-key, you'll get a better lightmap on that object, but it has to be 2-sided (copy and flip the one-sided poly, then match the texture coordinates from the original side). The downside to Chroma-keying is that it can't use the alpha fall-off. The texture's either there or not there -- so expect some jagged see-thru areas with some textures.