Keep Detail 0 brushes as simple as possible. It will make processing ingame easier.
To that end, make your DETAIL 0 shell brushes hidden behind the more complicated detail 1 visible brushes. The detail 0 shell encloses your level and if you can hide every detail 0 you can texture them with invisible, set invisible true, lightmaps and all lighting properties to FALSE, set block light False, and just keep them solid. The result, you will save rendering time. You will be able to push more polies by not having to texture or shade the hull.
There are two BSP trees in the compiled .DAT file. The physics BSP tree used to determine physics collisions with static geometry and to seal the level. And the visibility BSP used to determine what can be seen from any given location.
DetailLevel 0 geometry is in both the Physics and Visibility BSP. Even if it's nonsolid it can still seal the physics BSP if it's DetailLevel 0. Outside shell walls should be DetailLevel 0, the simpler these are the better.
DetailLevel 1 geometry is in just the Physics BSP but not the visibility, the engine doesn't take these brushes into account when determining what can be seen. All small details in the world should be DetailLevel 1.
Brushes bound to objects are not taken into account when determing visibility.
Optimizing Your Level
This is straight out of the docs folder. Which if you haven't read it by now, makes me wonder. Take advantage of the resources that monolith has provided. All information is good information.
It’s actually fairly easy to make a gorgeous Notre Dame-scale cathedral in DEdit. Once you know the basic controls, you can pretty quickly lay out the brushes, apply the textures and add in the lighting necessary to make such a structure. However, it is also extremely easy to build a level that:
Will not compile
Will take far too long to compile
Will run poorly in the game even after a full optimization
This is truly where the science of level design begins to take a back seat to the art. Though there are some basic rules and a lot of guidelines to optimizing levels, the best way to learn good optimization techniques is to experiment and to carefully observe the results you get inside your levels. You must think about optimization right from the moment when you first begin designing your level, and you must watch the performance of your level every step of the way as you build. Unlike any other computer art product, computer games are rendered in real time , and this restricts you substantially in what you can get away with in your levels.
Factors That Cause Levels to Bog Down
Levels can become bogged down for a number of reasons. The first of these is high polygon counts in a scene. Even a simple empty room that has only walls, floor and ceiling can be made up of several hundred polygons. In order to apply lighting and tune the level’s performance, the brushes that you specify inside DEdit are broken down, juggled around and reshaped by the Processor as it builds the in-game .DAT file out of your .ed file. As mentioned above, this process is one of the reasons why you can’t edit a .DAT file in DEdit. To measure the polygon counts in your game, you use the ShowPolyCounts console command. As a general guideline, the game designers for AVP2 kept multiplayer levels to around 700 polygons/scene in general on multiplayer levels and 800 or so for single-player levels where frame rate was not as vital. It’s important to perform some tests of your own on your target platform to develop your own standards.
Lighting a level via lightmapping requires that large brushes be broken down into smaller chunks. This usually happens along texture boundaries. Thus, if you have a large room with a 64x64 floor texture, the floor may be broken up into dozens of 64x64 chunks when in the editor it is shown as a single brush. The reason this is done is to create the lightmap textures, which give the floor lighting. In the case of a moderately large room, this may add 200 polygons to the scene, but in some very large rooms it can add 400 or more polygons. It’s important to take that overhead into account.
There are ways to reduce this press somewhat. The first is to try to break up large spaces so that only some of the space is visible at a time. The second, useful in outdoor areas without great ground detail, is to scale up the texture on the floor. Often, a 64x64 dirt texture looks acceptable if scaled up to 128x128. In some cases it even helps give a sense of scale to the outdoor room. It’s important to test this technique yourself and decide whether or not you like the result.
There are also brush properties that you can use to affect the method used to light your brushes. The LMGridSize parameter listed in the WorldInfo string section describes how you can scale up your lightmaps in order to reduce the number of polygons created for lightmapping, which can lead to a decent savings in poly counts for large rooms. In many outdoor cases (one of the most common places where problematically large rooms appear), using Gouraud or flat shading can prevent subdivision while still giving a good light effect.
The second cause of high counts is complexity. It’s very hard to resist the urge to put every detail into your geometry instead of using textures to create detail. However, it is much more expensive to add detail using geometry than it is to imply detail through tricks of the eye, lighting and texturing. Avoid nonfunctional detail that can be added through textures like molding/trim, curlicues, grooves and bumpy surfaces. A level designer's art is figuring out how to imply detail. Ask your texture artists to build a grooved surface or the face of a curlicued building ledge, and then apply that texture to a simple flat surface. Use as few sides as you can get away with on your columns and carefully consider how to build each shape with the fewest polygons. Another typical cause of high counts is intersecting brushes. Every place where one brush touches another, the processor splits the touched brush in order to remove the hidden sections of each brush. However, this can drive counts up very significantly. A large, square room that’s normally lit would be subdivided into a simple grid of square brushes. If you place a square column in the middle of the room, the room's still split along a square grid, since the splits around the base of the square column run parallel to the grid of splits made for lighting. However, if you put down a 12-sided column in the middle of the room, split lines run out from each of the 12 vertices that make up the base of the column. These lines disrupt the even pattern that existed before and scatter new brush splits throughout the room. You can observe this by using the DrawFlat and ShowSplits console commands.
The best way to avoid this problem is to carefully pre-plan before adding details in areas where their effects will be drastic. One way to do this is to bind such objects in a WorldModel in cases where that won’t affect the object's functioning. Also, in many cases such as light fixtures and some columns, you can build your fixture and then move it 1 to 4 units away from the surface it would normally be touching. That prevents the split, and in many cases the player will never notice the difference. You must be careful using this technique, however. If you place a light in the right location, it will give away what you’ve done since the lifted object won't cast a proper shadow.
Another issue that increases your polygon counts in a room is visibility leaks. To explain, the computer and the player see the level in different ways. The player can’t see anything that’s behind a solid wall or any solid surface. However, the computer always looks just a little bit ahead and pre-draws some objects that may not yet be visible to the player. This is for two reasons: One, the computer estimates cautiously when it decides what the player will be able to see. Two, the computer pre-loads some geometry that it thinks the player may soon be able to see in order to spread out the press of loading the polygons and textures.
This usually comes in the form of a wall or other fixture in the next room that adds to the poly counts in the current room. Sometimes the increase in counts makes very little sense. You can have a very small room without any real detail such as an entryway with the polygon counts of a much larger, more detailed room. If you look around in a room like this, you can almost always find either a hallway into another more detailed room or a leak to the outside of the level.
Troubleshooting Visibility Leaks
Two useful console commands come into play when troubleshooting visibility leaks: LockPVS and Wireframe . The first command, LockPVS , tells the engine to continue drawing whatever is currently visible to it (the Potentially Visible Set ) and not to load any further brushes into the world until it’s un-frozen. Use this when you're getting high counts in a particular view and want to see what’s being drawn in another room. Once you get the high counts on your screen, enter LockPVS 1 on the console. After that, you can walk the area and see what the engine's drawing. Only objects that are visible from the point where you locked the PVS will be drawn. The Wireframe mode is harder to work with but more flexible. It switches your view to a wireframe view of the level. Since all brushes are transparent in wireframe view, you can see right through a wall into rooms on the other side. This means you can also see what brushes are being drawn in rooms other than the one you are in. Though it takes some getting used to, this mode makes it possible to figure out exactly when and where the view of a room or object is cut off, making it extremely useful when you want to check your visibility blocks. This command should be used in conjunction with the ForceClear command if you get bad redraw effects when WireFrame is turned on. Some games do this automatically. You may also want to use the DrawFlat command to turn off textures, which makes it easier to see the wireframe lines.
You can break visibility between rooms most certainly using a corridor with a pair of 90-degree turns in it. A U-turn should totally cut visibility, and an S-turn with the proper length of corridor in between the two turns will almost always work. Below that, controlling visibility becomes an art. Often, you will be amazed by what the engine decides you can see from a given point. It's important to carefully walk your level and watch polygon counts for this reason.
Note: If you haven't done a Full Optimization compile on your level, you cannot rely on the visibility or poly count results you obtain. Full Optimization cuts down counts far, far more than a Fast Approximation does. Similarly, if you don't compile with optimization turned on at all, your whole level is visible from all points, leading to counts that are much higher than they will be after optimization.
In order to increase your chances of blocking off line of sight between areas, there are several things you can do. First, make use of kinks in between areas as described. Second, make sure that walls extend from the floor of a room to its ceiling. Third, make sure your walls fit snugly together. Fourth, keep the number of connecting doors, windows or vents between rooms as low as is reasonable so that you can more easily troubleshoot. Fifth, treat your outdoor areas in the same fashion, dipping your sky portal brushes down like a ceiling to close off one region of the outside from others. Use hills, hedges and tall buildings as walls to reach up and touch these sky brushes, thus completing the seal. The last tool to help you close off one area from another is the hullmaker brush.
Working With Hullmakers
Hullmakers are special brushes whose Hullmaker property is set to True. To make a hullmaker brush, you switch to Geometry Mode, and then lay the points for the brush you want to create. The resulting brush has a zero thickness (which is as you want it). You should place hullmakers in doorways or hallways where you feel visibility should be blocked off but you can still see polygons in the next room. Make sure that your hullmaker completely fills the doorway or hole that you are trying to block, and that the only property set to True on the hullmaker brush is Hullmaker .
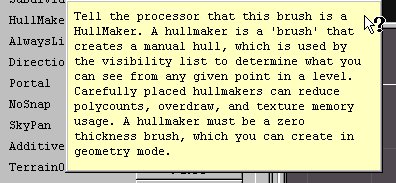
The player should never see these brushes inside a game level. Their sole purpose is to split the hulls of the level where they're placed, encouraging the engine to block visibility there.
Hullmakers do not work 100 percent of the time; often, the engine decides that despite the split the player can still see past and into the room beyond. Sometimes, placing hullmakers can even split up brushes in ways that drive up polygon counts. Don't dump hullmakers into a level expecting miracles.
Pick a problem area and carefully add hullmakers or modify the layout around the area until you see the results you want The last way to reduce polygon counts is to make sure that your level is sealed . The best way to think of your level is as a submarine or spaceship: right outside it there is a bad, unfriendly place. The interior of the level should always be isolated from the outside by a solid shell of brushes, none of which are bound to WorldModels, have their Invisible flag set, or have their Detail Level set to 1 or higher.
In other words, it should be impossible to see or reach the outer space around your level. This is where careful brush creation habits and compiling regularly while you build are helpful. It's much easier to catch a leak when you first cause it than after you've built an entire room.
Plugging Leaks
If your level does develop a leak, you can use a leak file generated by the Processor to help find it. To create a leak file, enter the command string
–leakfile myfile.leak
in the Extra Parameters field of the Processor. Once the Processor makes its leak file, load it into DEdit using the World menu to select Debug , and then click Load Leak File . This helpsyou to follow the path that appears until you find the hole. Plugging leaks is important for three reasons. First, leaks can cause parts of the outer shell to be visible inside the level, unnecessarily increasing your counts. Second, leaks keep the level's outer shell from being removed by Processor, increasing the size of the level's .DAT file on disk. Last, if Processor has to do visibility calculations for the outer shell, it will take a great deal longer to complete. It pays to plug your leaks.
Another concern is a factor called overdraw , which is the number of polygons drawn on screen that are actually out of the player's view behind other polygons. This is related closely to the visibility optimizations referred to previously. You can often find high levels of overdraw in rooms with lots of detail: columns, low walls, complex fixtures and cracks can all lead to overdrawing. Overdraw in a scene is measured using the ShowFillInfo console command. In the development of the game Shogo , for instance, values of 2-3 here were considered acceptable and values of 4-6 were danger signs.
Once again, testing on your target platform to obtain figures for your own game would be wise. Besides geometry-related factors that may slow down your game when it's running, you can also get significant slowdowns if you use too many textures or several overlarge textures in a scene. Even in the age of AGP, if you use a 512x512 texture for everything from tiles on the bathroom floor to murals to the nameplate on a door, the game will run more slowly. As with many problems, this is best addressed in the design stages rather than in the testing stage.
You should try to resist the urge to use the largest texture possible and instead work to find a balance between a texture that looks good and is small in size. Objects that won't get much scrutiny like floor/ceiling tiles, wall-to-wall carpets and grass should usually be given small textures. Objects that the player will focus on (view screens with data, pictures, signs) can use higher-resolution textures. The console command ShowTextureCounts provides information on textures for help in troubleshooting.
Entities can also affect game performance. If you build a huge particle fountain that creates 1000 particles every second with a decay time of 10 seconds on each particle, the engine is going to be very busy keeping track of the particles. Likewise, large, moving objects such as props made from WorldModels can slow the engine down as it tries to manage their physics.
Character models and AI can also affect frame rate. A level that runs fine with just the player on it can bog down seriously when two very intelligent AI enemies are added to it. Likewise, a Boss character with thousands of polies in her character model will slow the engine much more than a minor character with just a few hundred. Be careful how you code, design and place your AI. Also, be sure to test the results to make sure you haven't stressed the system too much. The ShowTickCounts command gives useful information for figuring out these sorts of generalized issues by listing what portion of the engine's time is spent in what area, be it rendering, sound or game code. As mentioned before, optimization is more art than science, and it takes practice. The warning signs of trouble you should always heed are low frame rates, high polygon counts in a scene, and sudden jumps in the length of time it takes to process your level. Any of these should make you take notice.
Immediately backtrack and figure out what has caused the issue. Even if you don’t do anything to correct it at the time, performance issues are almost always easier to fix if they're identified early. It is heartbreaking to have to discard a level that is completed but completely unworkable, and you will do so if you don't pay careful attention to optimization throughout the construction process.
Excerpt from the TOOLS\DOCS\FOLDER Optimising your Level